Showing posts with label crochet. Show all posts

Tuesday, 19 March 2013

Tweet Tweet

I recently bought some wall art stickers for the living room. I thought they would brighten up one of the walls. It's difficult to know what else to put on the wall to be honest. It's next to the chimney so a picture tends to look out of place.


This spurred me on to finish the bird I was making to hang in my crocheted wreath. I'd cut it out and sewn it one Monday night but forgot to take the stuffing with me so had to leave stuffing and sewing up until I got home and it was one of those jobs that just got left. Anyway, it's now finished.


I also managed to finish the bunting for the kitchen yesterday (sorry, will get a pic for the next blog post as I forgot!) so that was two UFO's finished. I started the bunting at the end of October but other things kept getting in the way of finishing it. What usually happens is I think "Oh I'll take X to sewing so I can ask for help with such & such/I need to concentrate on it" and leave all the simple stuff to do at home and then just don't find the time to get all the sewing stuff out.

I also designed a robot applique block for the sampler quilt I'm making. Here it is and I'm really pleased with it!


There's still far too many UFO's for me to list but I'm hoping to get a few finished this year. I only have one item on my crochet UFO list (a cushion cover) but plenty on the sewing/quilting list.

Tuesday, 27 November 2012

Pattern: Simple Leaf

As I promised the other day. Here's the pattern for the leaves I used on the wreath.


I've included photos to help explain. Let me know if it's not clear!

I have used US crochet terms throughout. Leaves were made using Rowan handknit cotton on 4mm hook.

Leaf:

ch 6


Sl st in 2nd ch from hook, sc in next ch, hdc in next ch, dc in next ch


Your work should now look like this!

In the next ch (this will be the one nearest the knot) make the following stitches:
tr, dc, hdc, sc, hdc, dc, tr

Do not cover the tail end of the yarn
This is what it looks like after the sc

And this is when you have done all the stitches in that ch

From the back - tail end should stick out
You will now work back along the other side of the chain.
dc in next ch, hdc in next ch, sc in next ch, sl st in last ch


It should now look like this
You now need to make an extra slip stitch (see picture below for where to make it). It is fairly obvious when you've got to this stage where the loop is but it's basically the side of the original turning chain.


Now tie the yarn off and leave a long tail. Your work should look like the pictures below.


When you start to sew in the end of your yarn make sure to take it through the back loop of that stitch that is sticking up at a funny angle.


Just like this!

Sew in the end so that it comes out at the same point as the other end


You can now use these two ends to attach the leaf to the wreath (or whatever else you're making) before weaving the ends back along the leaf to finish off.


Monday, 26 November 2012

Update: Wreath

Here's a little update on the crocheted wreath. I have done the flowers and am planning on making the bird next week at sewing (where I have access to the pattern).

Some of the flowers are done in a pattern I use regularly for flowers. I can't even remember where I got it from. Others are done in the May Rose pattern on the Atic24 blog. The leaves are my own design and I'll post a tutorial soon. I can write out the pattern but it will make more sense if I have pictures to explain a couple of parts to it.


Wednesday, 21 November 2012

WIP Weds: Wreaths & Other Xmas Decorations

It's definitely feeling a lot closer to Christmas now. We have family visiting for the next 3 weekends. I'm making a start on more Christmas decorations but, as ever, my head is full of things I want to make that I just don't have time to do! I'm trying to be realistic with the time I have.

So, first up I whizzed this jar cozy up yesterday afternoon. I'm planning on adding some extra detail to it, perhaps a little wreath. I was going to do a wreath by crocheting around a circular curtain ring but I can't find where I've put them so may have to come up with an alternative idea.


I also grabbed a bunch of scraps and made up an Attic24 Bauble Decoration. Mine are a little different because I didn't have any beads with a big enough hole and I decided not to add the buttons as I wasn't adding the beads.


I made a second one later that evening while Alan put the kids to bed. It really is a quick make and a good way to use up scraps.

I'm not sure why but this year I have a bit of a thing for wreaths. We don't really have a very good door for wreath hanging so I'm going for indoor wreaths! These little squares are going to be used to make the gorgeous Ragtime Christmas Wreath on the (fantastic!) RosMadeMe blog.


I have a fair bit more cutting out to do and I can't put it together yet as the shop I was going to get the polystyrene ring from was out of stock until later this week. Fingers crossed they'll have some on Thursday.

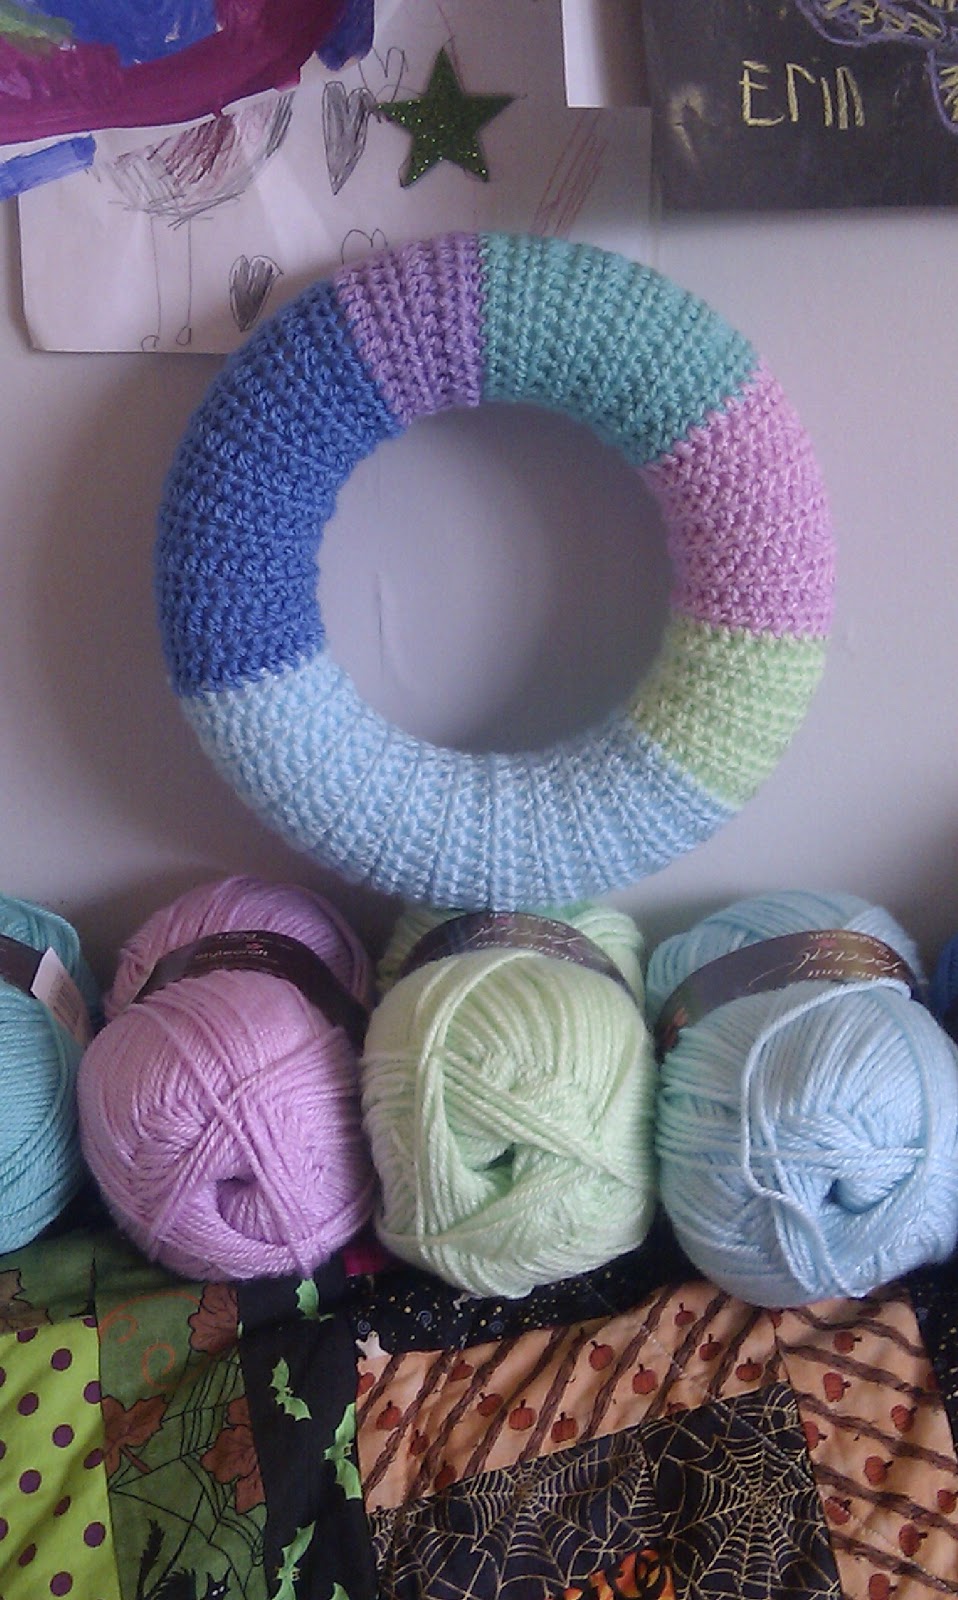
In the meantime I started a crocheted wreath. This is done over a 17cm full polystyrene ring using the method Lucy described here in her May Rose Wreath Ta-dah! I haven't decided yet what I'm going to decorate it with. I'm currently thinking a few flowers grouped together on the edge and a bird hanging inside. I do have memories of sewing a hanging bird decoration last year and it was incredibly fiddly, so I may change my mind!


This is done in Stylecraft Special DK in the following colours:
Aspen
Clematis
Spring Green
Sherbert
Aster
Wisteria


Joining in with Tami's Amis. Check out lots more WIP posts!

Tuesday, 20 November 2012

FO: Little Hug Blanket (includes pattern for squares)

Last week my husband had to work in London for a couple of days. Luckily for me, it was Thursday and Friday. Both girls are in school all day on those two days and they were fairly tired afterwards, particularly Orla. It meant both were in bed asleep by 7pm so I got two extra evenings of peaceful, free time. I managed to finish off the 20 squares I was making from leftover yarn, join them together and add a simple border.


These squares are so easy to do and give a more solid look to a blanket than a traditional granny square. So here's some (basic) instructions using US terms (brits can just substitute every dc for a UK tr):

Make ring:
ch4, sl st into first stitch to form ring

Round 1:
ch3 (counts as first dc), 3dc, *ch2, 4dc*, Repeat from * to * two more times, ch2, sl st into top of ch3 to join

Round 2 and each round thereafter:
ch3 (counts as first dc), *dc in each stitch across, in corner space make 2dc, ch2, 2dc*,  Repeat between * and * all the way round, join with sl st to top of ch3
Note: You will not end in a corner space - the number of stitches after the corner space will depend on which round you are on.

When square reaches desired size tie off and weave in ends.

I used 5 colours and made four 6" squares in each. I arranged them randomly and joined them using the slip stitch method (put them right sides together and slip stitch through the back loops i.e. the loop closest to you and the loop furthest away).

For the border I did a simple US sc in each stitch around and 3 in each corner.

Excuse the feet in the picture!

Tuesday, 13 November 2012

A Bit More Crochet

Mainly using up leftover yarn at the moment. All the following are for the WoollyHugs cause.

One of the things I'm loving about this project is that I have a good excuse to try new squares and adjusting patterns. It's something I very rarely do for personal projects because I like to just get on with things but making things that someone is going to get so much pleasure from makes me put in more effort than usual.

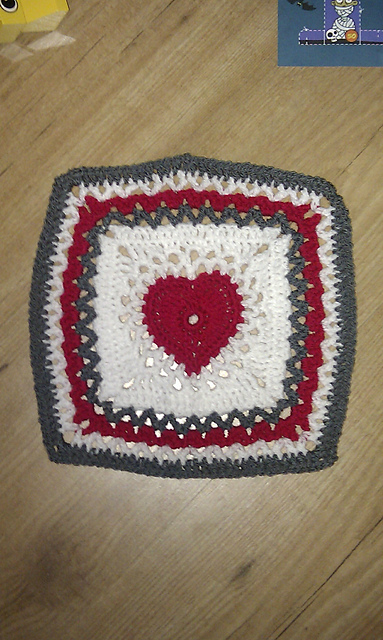
First of all I decided to use this Centre Heart Square pattern. I was using DK yarn rather than Worsted so knew it would come out smaller than the 12". I managed to make it 10" by missing the last row.


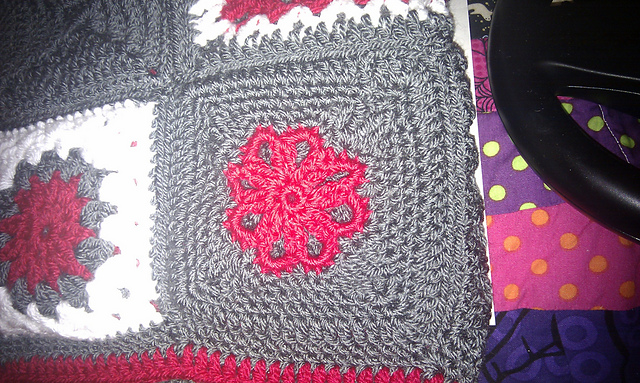
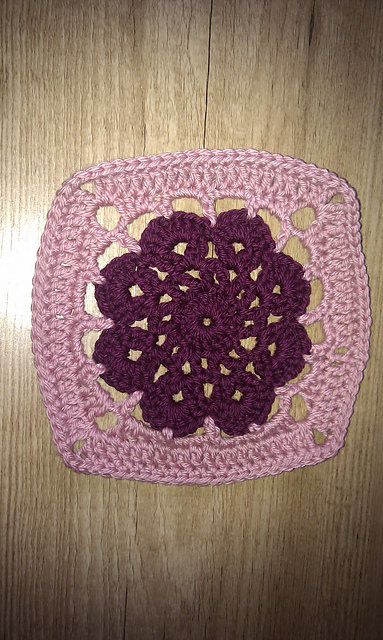
I then made some 5" plain squares and some 5" squares using this Flower Granny Square pattern and some using this pattern, also called Flower Granny Square (confusing, eh?)


As you can probably tell from the above picture I've joined it all into a blanket and put a border on. Unfortunately the central square was a bit baggy and I was hoping that adding the other squares round it would pull it all out into shape nicely but it's made the other squares look odd too. It's a bit late to frog it so I'll send it in and hope someone likes my wonky, saggy blanket!

I've also made a square with the More V's Please pattern for a memory blanket. This is a 12" pattern but I followed the instructions up to and including Round 7 and then added a round of US single crochet to make it 6" square.


I've started on another plain-ish blanket made with the leftovers from the Christmas present blanket I made. 4 squares done this afternoon and I'm hoping to get 20 out of my leftovers. Fingers crossed.

Thursday, 8 November 2012

FO: Blanket No 2

Well I managed to get the blanket finished the other day. We were having a party on Sunday evening and it was the push I needed to get on with sewing the ends in and doing the border so that it could go out of the way. In the end I decided to do a fairly plain border, mainly because the other blanket has no border and I didn't want one to look lots fancier than the other.

So here it is:


I used a crab stitch (also called reverse single crochet) for the edge


I also managed to make lots of cakes for the party. I did some Apricot & Banana Muffins and some Vanilla Cupcakes:


And we carved the pumpkins to sit on the table:


Friday, 26 October 2012

WIP: Blanket 2 & More Bunting

Sorry for the late WIP post this week. I've not managed to get anything finished this week so there's no FO Friday post. Still, I hope you enjoy seeing what I'm working on. First up is the second kid's blanket. I still haven't decided which child is getting which blanket. At the moment I'm thinking of wrapping each of them in a gift bag and letting Alan write the name on the bag so it's a surprise on Christmas Day.

I'm now up to 60 stripes. another 10 to go and then a border to go on.

60 Stripes done, 10 to go!
I'm really loving the Halloween bunting I made and decided that really I should have some bunting in the same place when it's not Halloween. I had a little search around in my fabric stash and was sooooo happy when the little scrap pack of 4 fabrics I bought at the Festival of Quilts were big enough to get two front pieces from. That was enough for the 8 flags and I just backed them in some leftover off-white I had from another project.


I bought these fabrics with the idea of making 'something' for the kitchen but I didn't know what. I think they're perfect for bunting. It's just one line of sewing left to do (to join them to the binding) and it'll be finished but it's such a small job that I've not managed to convince myself to drag the sewing machine out for that one line!

Also this week I treated myself to two new craft books as I got a £20 Amazon voucher.

First up is this crochet book I've had my eye on for a while: Around The Corner Crochet Borders by Edie Eckman. I make a lot of crochet blankets so I'm looking forward to trying out a few more borders for them.

Secondly, Country Cottage Quilting by Lynette Anderson. There's a lovely little purse and needlebook if you look through the preview that I'm looking forward to making.

I'm keeping my fingers crossed they arrive early next week so that I can add a different border to the granny stripe blanket above. My other two granny stripes use the border that Lucy used on hers.

Friday, 19 October 2012

FO Friday: Blanket 1

I'm now over halfway on the second of the kids' blankets and I have finished the first one. It's been a bit hectic this last week because I had a 3 hour exam on Wednesday afternoon so had LOADS of revision to do. I was massively behind with the reading for this course...it ran from the end of January so hit two half-term holidays, the Easter holidays and the big 6 week summer holidays. I also had toothache and tonsillitus and, in case that wasn't enough, Orla pretty much dropped her afternoon nap. All that meant I lost many planned hours of studying. The books were also very 'wordy' so required hours of quiet concentration unlike my previous courses which could be read in 5 minute chunks when the kids were playing nicely.

My plan after the exam was to spend yesterday just sitting and relaxing but it didn't quite happen! I did a bit of tidying/cleaning the kitchen and a bit of laundry, then wrapped some Christmas presents but I did find sme time to sit and crochet. I've now done 4 of the 7 colour repeats on the second blanket (so about halfway as there'll be a border to go on).


On the first blanket I sewed the ends in and started to add a border but I decided it didn't really look right so pulled it back out again and have left it without a border.

You'll have to imagine it's finished as I forgot to take another pic!
I've wrapped it ready for Xmas. Unfortunately I asked the kids which blanket they liked best and they BOTH said the other one. I was quite surprised tbh as I think this is much brighter and more interesting.

Tuesday, 9 October 2012

FO: Blanket & Halloween Wallhanging

I was really lucky to receive the cream yarn I needed to finish a blanket for the WoollyHugs project very quickly. As I was also waiting on yarn for most of my other projects I cracked on with the little blanket. I did a couple fo rounds of cream and then did a pretty border. This was based on one from the Attic24 blog (click here for Lucy's tutorial) but I used more stitches per chain 5 space. Basically into each chain 5 space I did (US terms!) sc, hdc, dc, tr, dc, hdc, sc. I also didn't do the slip stitch.

Here's the finished blanket:


Close up of edging: 


On Saturday morning my husband took the kids to gymnastics and gave me chance to get on with sewing. I've been getting a little stressed about how many projects I have on the go and really wanted to get on and finish something. It seemed obvious to finish the one that had the earliest "deadline" so I started working on the Halloween wallhanging. I say "deadline" because it doesn't really matter if it's not done until next year, after all, I started it before last Halloween!

Anyway after a bit of frustration finding suitable beads/buttons etc. and discovering the binding I had wasn't quite long enough (honestly it would have been about half an inch short!), I finally managed to get it finished. In the end I decided to stitch it right sides together and turn it through rather than bind it.


I just love the owl peeking on one of the hanging loops


Here's a close up of each of the pictures:

Frankenstein

Witch

Cat

Ghost

Tuesday, 2 October 2012

Grannies Galore!

First of all an apology for missing FO Friday last week. I'd planned to write my blog post after picking the kids up from school but my 3 year old decided she was really tired yet didn't want to sleep. That meant I didn't get a chance to write my post. Then I was a little silly at the weekend and managed to wrap the Mario coaster I made before I got a photo of it, so I guess you'll all have to wait until Xmas!!!

I have finished a few other things this week. First up is a "Giant" granny square blanket. I use the term giant quite loosely as it's for seriously ill children/babies and is only 18" square. As I was changing colour every rounds I turned my work too to prevent getting a wonky centre.


This is made from (donated) Stylecraft Special DK in Plum, Cream and Cloud Blue. As there was loads left I started a slightly larger simple blanket, made using US dc, as a little break from granny square production! I didn't count the number of stitches when I started it, but it was slightly under 80 I think. I have used each colour in turn and done stripes of 3, 2, 1 and 1 rows. hope that makes sense to you! Basically 3 rows of colour A, then 2 of B, then 1 one C, then 1 of A, then 3 of B, then 2 of C, then 1 of A and 1 of B and so on.

It looks a little out of shape here cos it's been sat folded up!
 I then decided I might have enough for another Giant Granny Square.


 Well, as you can see I didn't have enough. I had to raid my stash and the only colour I ahd that would go was a pale grey. Unfortunately I also ran out of that!!! I'm now awaiting some cream for the final two rounds. See the centre is getting a little wonky? That's why I turned my work on the first one.

With the little scraps I had left I made a 6" granny square. Hopefully this will go with squares other people have made to make a blanket.


Hoping to post these out tomorrow and will send the unfinished one in the next batch.

I have also managed to finish the granny squares for one of the kids' Xmas present blankets. I still haven't deicided which child is getting which blanket but here's the 84 finished squares.


They just need joined together. My plan is to lay them out on the living room floor one evening when the kdis have gone to bed and play around with them until I have a layout I like, then join them all together - might be a late night :-/

If that wasn't enough I've also done a little work on the granny stripe (the other Xmas blanket)